 解锁垂直美学!如何在你的Raspberry Pi相框中仅显示竖版照片!

如何在你的Raspberry Pi相框中仅显示竖幅照片
这篇文章可能只针对一小部分读者,但这就是像这样的博客的乐趣所在:你可以深入探索各种极客话题。
已在搭载 Bookworm Wayland 的 Raspberry Pi 5(2024年11月)上测试。
Pi3D PictureFrame允许在相框为横屏方向时并排显示两张竖幅模式的照片。
因此,我想有一个简单的功能会很不错,这个功能可以自动将你添加到图片文件夹中的图像按竖幅、横幅和正方形分类,这样你就可以选择只显示其中一种。
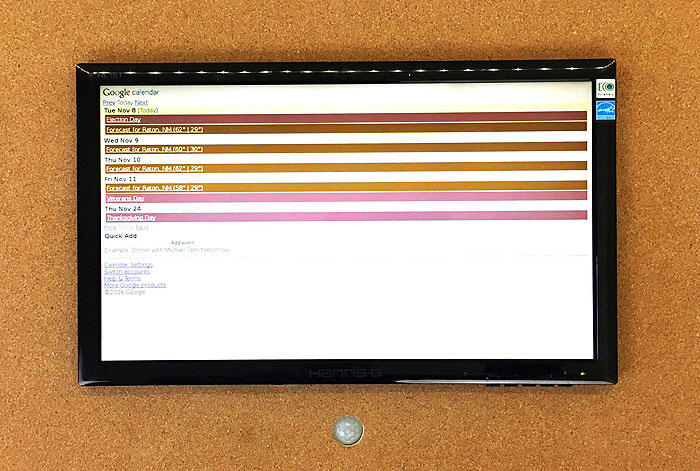
同样,当你将你的数码相框以竖屏方向安装时,只显示竖幅照片会更好。以竖屏模式显示的横幅照片看起来会非常小。
因此,这里有一个Python脚本,它可以对你放入图片文件夹的照片进行分类,以及一个在启动时运行以保持脚本运行的服务。
然后,你可以使用 Home Assistant 或通过MQTT或HTTP命令选择只显示竖幅目录。如果你的相框可以旋转为竖屏或横屏方向,那就太棒了。
用于分类的Python脚本
使用像Sublime这样的编辑器或以下命令创建一个脚本:
sudo nano sort.py
然后将以下文本粘贴到文件中:
import osimport shutilimport timefrom PIL import Image, UnidentifiedImageErrorfrom watchdog.observers import Observerfrom watchdog.events import FileSystemEventHandler
# Define pathspictures_folder = "/path/to/Pictures"portrait_folder = os.path.join(pictures_folder, "Portrait Orientation")landscape_folder = os.path.join(pictures_folder, "Landscape Orientation")square_folder = os.path.join(pictures_folder, "Square Images")
# Create folders if they don't existos.makedirs(portrait_folder, exist_ok=True)os.makedirs(landscape_folder, exist_ok=True)os.makedirs(square_folder, exist_ok=True)
# Set to track skipped filesskipped_files = set()
def is_file_complete(file_path, wait_time=1): """ Check if a file is fully copied by comparing its size multiple times with a delay. """ for _ in range(3): # Check 3 times to ensure completion initial_size = os.path.getsize(file_path) time.sleep(wait_time) final_size = os.path.getsize(file_path) if initial_size == final_size: return True return False
def classify_image(file_path): try: if is_file_complete(file_path): with Image.open(file_path) as img: width, height = img.size if width > height: destination = landscape_folder elif height > width: destination = portrait_folder else: destination = square_folder shutil.move(file_path, destination) print(f"Moved {file_path} to {destination}") # Remove from skipped files if it was previously skipped if file_path in skipped_files: skipped_files.remove(file_path) else: print(f"File {file_path} is still being copied. Adding to skipped list.") skipped_files.add(file_path) except UnidentifiedImageError: print(f"Cannot identify image file {file_path}. Adding to skipped list.") skipped_files.add(file_path) except Exception as e: print(f"Error processing {file_path}: {e}")
def classify_images_in_folder(): for filename in os.listdir(pictures_folder): file_path = os.path.join(pictures_folder, filename) if os.path.isfile(file_path) and filename.lower().endswith(".jpg"): classify_image(file_path)
class ImageHandler(FileSystemEventHandler): def on_created(self, event): if event.is_directory: return if event.src_path.lower().endswith(".jpg"): classify_image(event.src_path)
def on_moved(self, event): if not event.is_directory and event.dest_path.lower().endswith(".jpg"): classify_image(event.dest_path)
def on_modified(self, event): if not event.is_directory and event.src_path.lower().endswith(".jpg"): classify_image(event.src_path)
def retry_skipped_files(): """ Retry classifying files that were previously skipped due to incomplete copying or unidentifiable errors. """ for file_path in list(skipped_files): # Iterate over a copy of the set if os.path.exists(file_path): print(f"Retrying {file_path}") classify_image(file_path)
if __name__ == "__main__": # Initial classification classify_images_in_folder()
# Set up the observer observer = Observer() event_handler = ImageHandler() observer.schedule(event_handler, path=pictures_folder, recursive=False) observer.start()
try: while True: retry_skipped_files() # Periodically retry skipped files time.sleep(5) # Adjust this sleep time as needed except KeyboardInterrupt: observer.stop() observer.join()
保存并关闭。
使文件可执行:
chmod +x /home/pi/sort.py
安装watchdog
Python有一个很棒的功能,当在目录中检测到新文件时,它会触发一个命令。
但要在脚本中使用它,你首先需要安装它:
source venv_picframe/bin/activatepip install pillow watchdog
现在,你可以通过输入以下命令来测试脚本是否工作:
python sort.py
创建系统服务
为了让脚本始终在后台运行,为脚本创建一个系统服务文件:
sudo nano /etc/systemd/system/sort_pictures.service
将以下内容粘贴到文件中:
[Unit]Description=Sort Pictures ServiceAfter=network.target
[Service]ExecStart=/home/pi/venv_picframe/bin/python /home/pi/sort.pyWorkingDirectory=/home/piRestart=alwaysUser=pi
[Install]WantedBy=multi-user.target
保存并关闭。
然后逐行输入以下命令以激活服务:
sudo systemctl daemon-reloadsudo systemctl enable sort_pictures.servicesudo systemctl start sort_pictures.service
使用以下命令检查服务的状态,以确认它正在运行:
sudo systemctl status sort_pictures.service
现在,将一些图像放入你的图片文件夹中。
脚本应该根据它们的尺寸将它们移动到指定的子目录中。
竖幅选项
现在你可以尝试两件事。
一是如果可能的话,更改相框的挂载方式为竖屏,并更改Pi3D PictureFrame中的设置。按照“如何在Raspberry Pi数码相框中使用竖屏方向”中的说明进行操作。
如何将你的树莓派数字相框设置为纵向使用:https://www.thedigitalpictureframe.com/raspberry-pi-digital-picture-frame-portrait-orientation/如果你不能这样做,你可以通过更改configuration.yaml中的这一行来尝试竖幅对:
portrait_pairs: True
要仅显示竖向(纵向)的照片,您可以在configuration.yaml中更改默认的“Pictures”目录,或者如果您已安装Home Assistant,则可以通过它来设置目录。
或者,您也可以暂时从主“Pictures”目录中移除“Landscape”(横向)和“Square”(方形)目录。祝您使用愉快!
-
python
+关注
关注
56文章
4828浏览量
87096 -
Raspberry Pi
+关注
关注
2文章
620浏览量
23178
发布评论请先 登录
如何在Raspberry Pi上安装TensorFlow
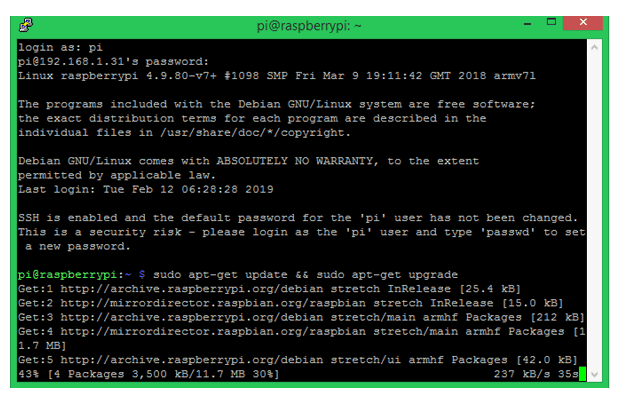
如何在Raspbian上设置没有显示器和键盘的Raspberry Pi
如何制作Raspberry Pi树莓派的SD卡
极致小巧的树莓派新成员,仅 5 美金的 Raspberry Pi Zero 登场
【Raspberry Pi 3试用体验】试用进程大汇总(2016.6.21已更新)
Raspberry Pi 3和3 b +上的Android Pie 9.0
使用raspberry pi Pico的原因
工业环境中的Raspberry PI和Arduino
raspberry pi官网
如何在Raspberry Pi 3上安装OpenCV4库
如何在Raspberry Pi Pico中使用OLED显示器

使用Raspberry Pi 3自制智能相框和日历—第二部分
如何在Raspberry Pi零2W上阻止带有Pi孔的广告


 工商网监
工商网监
评论